Saturday, 28 November 2020

Let it Snow!


Happy Saturday everyone hope your all well. Have you managed to pick up any crafty bargains this weekend? There are some fantastic offers on in the shop which run until the 30th Nov. 
Today I have another Display card for you let me tell you I absolutely love this die so much I'm not usually one for fancy designs. I don't know whether you have noticed but my cards are always just a simple fold one but I cant stop creating with this. I find it so much less fiddly than the box ones and so easy to put together. 
I started out measuring round the die to figure out how big my card would need to be as I wanted to ink blend before I cut it out and I didn't want to waste my ink by blending a bigger area than needed. I also felt when it embossed the folds it might not blend smoothly over the top of them. Once it was all blended I spritzed some clear water on to add some texture and put it aside to dry.
I used a mix of stamps for the images the tree log and trees at the back are from the Beavering Around, the Elephant and Hippo are from Life's Up's and Downs and the bird is from Skating By Penguins I stamped these out and coloured them up with Copic markers and Die Cut them out. 
The next step was to die cut the Display card and snow hills, the snowflakes which are from the Falalala Scalloped Slimline Die set and the Let it Snow Sentiment Die. It was really easy to stick together, I found it was easier to pop in the two back snow hills before adding the front as it isn't so fiddly then. Once these were in I could pop on the front hill and add my sentiment. Placing the sentiment first helped with figuring out the rest of the layout in the scene. I just love how it turned out those snowflakes really pop against the blue.
I was so happy to be able to finally use the Hippo and the Elephant stamp set too. It is more of an Autumn theme but it works so well for winter too. I love to stretch my stamps to get the most out of them it helps keep your ideas fresh and its just super fun to do!
I hope you like my card for today and have a great weekend! Don't forget you can get 10% off in the shop using code T4TNATALIE10


Saturday, 21 November 2020

Fa La La, You make me Snow Happy!


Hi all Design Team Member Natalie here to share my adorable snowy reindeer card. The reindeers are from the new release in the Happy New Year Critters stamp set. It's such a fun versatile set that can be used for many occasions and as always mixes well with the other stamp sets. These Chubby cheeked reindeers are definitely one of my favourites from the new sets so I had to make a Christmas card with them.
I began by cutting out the new Falalala Scalloped  Slimline Dies I cut two of these out of white cardstock. I blended  Spun Sugar and Worn Lipstick Distress Oxides on one of them spritzing some water on to add some added texture. The other I created a snowbank on using the standalone Landscape Dies which I added the sentiment to. I made sure to keep the frames aside to use for later.
I cut out the Falalala out of white cardstock and fun foam and layered them so it popped out more. The snowflakes again are cut from white cardstock but I just kept them one layer. 
The reindeers are coloured with copic markers I used the same colours on both and like always batch coloured and die cut a lot whilst I had my pens out it just saves so much time in the long run. 
To pop my card on my card base I temporarily stuck the frame and pink base together with washi tape so it didn't move and I could make sure it was lined up correctly. I added doubled sided tape after just taking off one side at a time and popped it on my card base. Then the other frame I popped aside I layered it on top so the snowbank wasn't higher than the frame.
I hope you liked my card today I really enjoyed making this one and the pink sky was so fun to make. 
Don't forget you can get 10% off in the shop using code T4TNATALIE10
Happy Saturday everyone hope you have a great weekend!


Wednesday, 11 November 2020

Sneak Peek Day 3!


 Hi everyone it's Design Team member Natalie here sharing some more cute peeks. Todays set is the Happy New Year Critters and has to be one of my favourites alongside those adorable penguins. The reindeer with his chubby little cheeks just had me sold, I cant stop colouring him up so be prepared to see quite a few cards with him. 
I used the new Fa La La Slimline card die to create my card base and added some pretty pink distress oxides to it. I started out darker at the edges and lighter in the middle then spritzed some water for extra texture and added some gold paint flicks to look like confetti.
The critters are coloured up with Copic markers I used the same mix of colours for each one to add some uniformity and added a dark and light one at each side for some balance. The dog is meant to be laying on a balloon but I just thought it was super fun with him popping open the champagne. I die cut all the critters and instead of stamping and colouring my balloons I used the coordinating die to cut it out of some glitter cardstock. I like the pop of red for some contrast. 
For the sentiment I used the new Happy New Year Sentiment Die I cut it out twice once out of white cardstock and then again out of Gold cardstock then off set the gold over the top of the white. Then it was just time to stick everything together and pop it on my card base and my card was finished. 
I hope you love the new release as much as us don't forget you can tune into the live tonight for more inspiration and the release will be in the shop tomorrow morning. You can even get 10% using code T4TNATALIE10


Saturday, 7 November 2020

I can Bearly wait to see you!


Happy Saturday everyone it's Design Team member Natalie here. How are you all doing? I hope your all safe and well we are back in lockdown in the UK so I'm staying home and safe and crafting! I have such a fun Bear card to share with you all today. I love to mix and match sets so it' great that all the Time for Tea sets work so well together. I combined the Home Sweet Home, Woodland Critters and Beavering Away stamp sets for this card. I have to admit it wasn't what I had imagined when I first started this card I had originally made a little bear cave to sit in the middle surrounded by trees but it just wasn't working but you know these things happen and I still think it turned out super cute!
I had lost my mojo for a while so I spent time just sat colouring and die cutting Autumn images its great to have them and I find it helps seeing them sat on your desk. I just move them around and play with scenes and see what works well together and soon the ideas just start coming. So when my cave idea wasn't working that's what I did. 
In my folder of coloured images I also keep die cuts of bases so I can even use those to see what size I want, some even have a background stencilled on already where it's not quite worked for what I wanted then. For my card today I used the largest slimline rectangle from the new Slimline Scalloped Nesting Die set as you can see from the photo it was such a big card I struggled to fit it all in the photo!
I love slimline cards so much but boy are they tricky to photograph especially in square mode for Instagram. There's a lot of empty space in the top and bottom to fill but I struggle with getting the right balance of background props so if anyone has any tips send them my way!
I wanted to do something different for my blog post today that showed that even Design Team members don't always get it right first time or you know we struggle with things too. So I thought it would be fun to share my tips on how I get out of the rut and get back creating again. I hope you still enjoyed reading my ramblings and let me know what you do to get back into it again. 
As always I hope you liked my card and don't forget you can get 10% off in the shop using code T4TNATALIE10


Saturday, 24 October 2020

Stop Beavering Away!


Happy Weekend everyone it's Design Team member Natalie sharing my cute Beavering Away card. The new beavers are absolutely adorable and a great addition to the shop. 
I combined the stamp set with the new A2 Nesting Frame Dies and Mountain Scene Builder Dies to create a fun scene card.I started by cutting out the A2 Nesting Frame Dies out of some white cardstock I only used the largest one but popped the others to he side to keep for any future projects. I used this as a guide to cut out my base for my scene to go on. I stencilled some blue clouds in the background and drew some birds in the corner for a little added interest. For the rest of the scene I cut out the mountains the grass from the Landscape Edge Dies and one of the clouds from the Windmill add on Die set I think the other one was a random die cut I had lying around on my desk. I added some colour to these using distress oxides. 
The critters and tree are both coloured with copic markers I used the same browns from the beavers as for the tree this makes it quick to colour and keeps it uniform. I popped everything on my card base and added my sentiment in the corner and then popped the frame on top I coloured this with the same brown markers I used for the beavers. Then just added it to my card base and my card was finished. Have a great weekend and don't forget you can still get 10% off in the Time for Tea shop using code T4TNATALIE10


Saturday, 17 October 2020

You are Spooktacular!


Hi everyone it's DT member Natalie here with another cute Halloween card. Halloween has to be one of of my favourite occasions to craft for purely because they are just so much fun to create. I love to customise regular stamps sets and make them Halloween themed like this one. I used the new Home Sweet Home set to create a sweet, spooky living room scene. The rest of the elements come from the Treat Yourself and Spooktacular Stamp sets. I stamped out, coloured and cut out all my elements. Then created my scene.
I cut out a black frame using the new A2 Nesting Frame Dies then used the size to cut out a rectangular piece of card to fit behind it. I drew a line for the floor and used my copics to create a woodgrain effect then used the Fossilized Amber Distress Oxide to create a warm glow behind the fire. 
Once this was done I popped on my frame and added my scene and sentiment I love how well the sets just work together but then Time for Tea stamps sets always do which is what I love about them. It really helps stretch your stamps to get the most out of them. 
I hope you have enjoyed my card for today don't forget you can get 10% off in the shop using code T4TNATALI10 


Wednesday, 14 October 2020

Too Cute to Spook!


If anyone knows me they know how much I love Halloween crafting so I was so excited to see these cute new Halloween stamps from the new Time for Tea release. I couldn't resist making some cute Halloween decorations I used the new This is Your Day Die to create a cute banner and then made a fun tag with the coordinating dies to the Halloween stamp set. 
As you see I stamped out and coloured up a lot of pumpkins, ghosts and mice I find this a good way to get things started so I could play around with layouts. The pumpkins and Halloween stamps are from the new Spooktacular stamp set and the mice are from the Treat Yourself stamp set. 
I cut out six of the banners and two of the scalloped circles out of a thick black cardstock. I blended some purple clouds on all using the Scene It stencil and splashed on some gold splatters for added interest. 
Then popped on my my little scenes for the banner I placed twine in between the back and front pieces and the tag some pretty silver ribbon. 
As you can see there are still plenty of pumpkins, critters and ghosts left over so be prepared for some more Halloween fun ❤️
Don’t forget you can get 10% off your Time for Tea order using code T4TNATALIE10 


Saturday, 3 October 2020

Home Sweet Home!


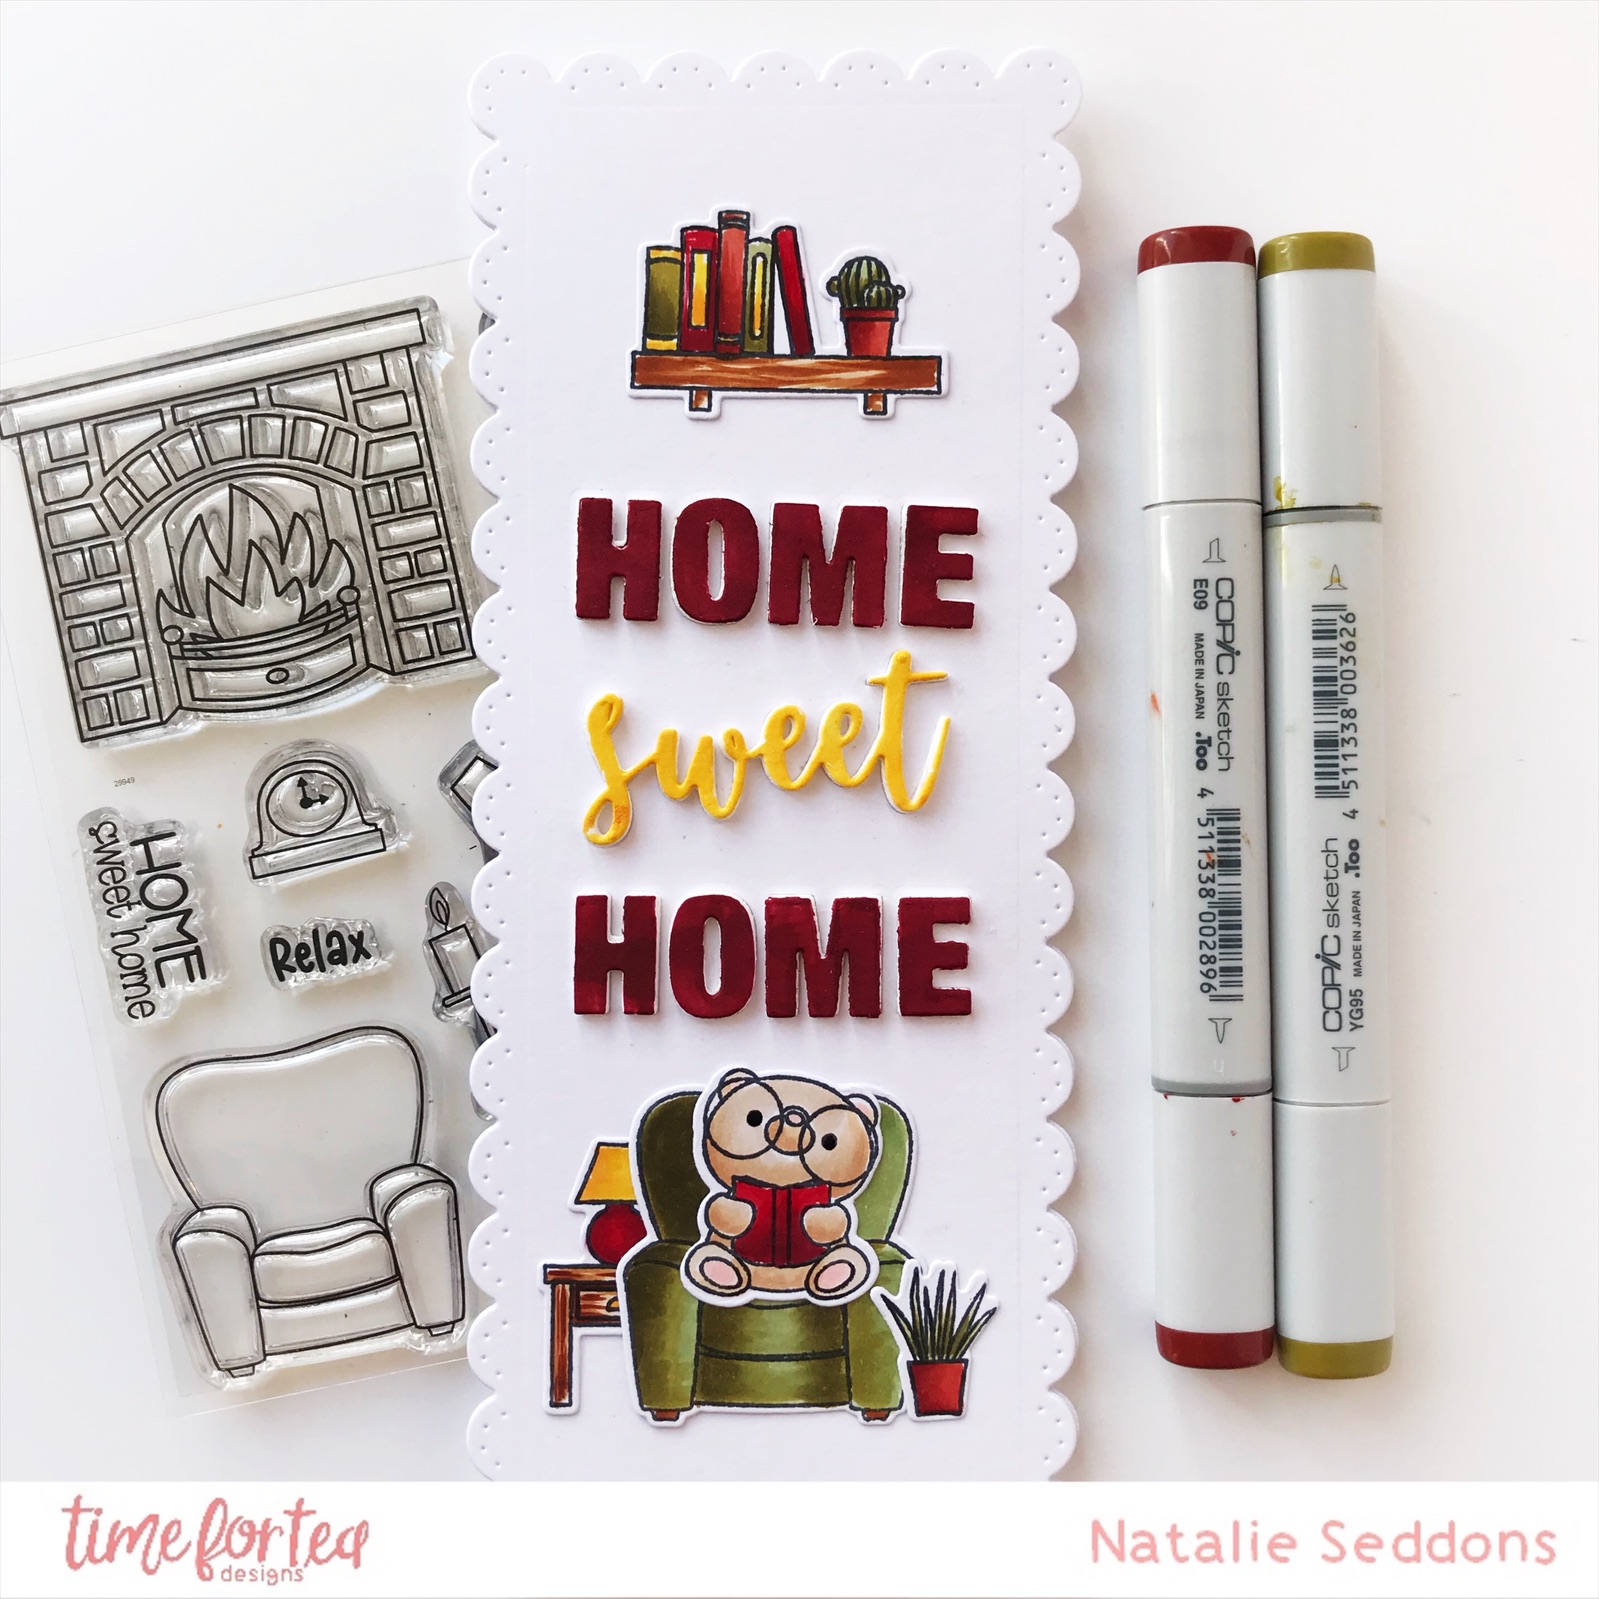
Morning all so what did you think to the new release? What's your favourites? It's another cute one right! I've been an avid reader since a kid so as soon as I saw the bear cosied up with his book I was in love. I love that that the set comes with so many accessories so you can build a home scene around him.
For my card today though I opted for a clean and simple look and choose some rich Autumn colours for the colour scheme. I wanted the new Home Sweet Home sentiment to be the focus point of the card so didn't want to add too much to detract from that. 
I began by cutting out three slimline scallop shapes out of white card and on one I cut out the home sweet home sentiment making sure to keep all of the pieces. I cut out another one out of fun foam too. I coloured in the sentiment using some rich reds and yellow just to give it a pop of bright colour. I layered the cardstock I cut out the Home Sweet Home from over the top of one of the other slimline card pieces. Taking the fun foam Home Sweet Home I stuck it into the Home Sweet Home I cut out earlier and stuck the sentiment I coloured on top, this gives it some height and a bit of added detail.
I coloured up my bear and scene using some rich autumn colours sticking to a small range of colours and cut them out and popped them onto my card. To make my custom base I took the last slimline scallop scored one and a half scallops down along the top and stuck it to the back of the front using some double sided tape. I hope you like it and I hope this gave you some inspiration for some weekend crafting. Don't forget you can get 10% off in the Time for Tea shop using code T4TNATALIE10 


Friday, 25 September 2020

Let's have Coffee!


Hi everyone the weekend is here already! I am absolutely loving clean and simple cards at the minute especially now I'm back at work so less crafting time. This one was inspired by Michelle Short who guest designed for us for the August release I loved the texture and detail she achieved using the sun die but with white on white. It gives added interest but doesn't take away from the main image.
I started like I always do and cut out the Sunburst Cover Plate Die I then used this to measure out my card base. The two hexagons are from the Bee Happy Hexagon Stitched Nesting Dies and are one of my go to dies. They have been so useful in framing small images and again they have the added texture detail but being in white don't detract from the image. I popped the smaller frame up with foam tape as well to give it some extra height. 
The little critters are from the All Occasion Critters Stamp set that was in the August release too they are so sweet. They didn't really take much colouring as they are only small. I used my go to my beloved Copics and cut them out with the matching dies. I popped them onto the top hexagon and stamped on my sentiment and stuck everything together. 
It's such a great design for when you need a quick card but still want it to really pop! I hope you like it as much as I do. Have a nice weekend and don't forget you can get 10% off in the shop using T4TNATALIE10