Friday 25 September 2020

Let's have Coffee!


Hi everyone the weekend is here already! I am absolutely loving clean and simple cards at the minute especially now I'm back at work so less crafting time. This one was inspired by Michelle Short who guest designed for us for the August release I loved the texture and detail she achieved using the sun die but with white on white. It gives added interest but doesn't take away from the main image.
I started like I always do and cut out the Sunburst Cover Plate Die I then used this to measure out my card base. The two hexagons are from the Bee Happy Hexagon Stitched Nesting Dies and are one of my go to dies. They have been so useful in framing small images and again they have the added texture detail but being in white don't detract from the image. I popped the smaller frame up with foam tape as well to give it some extra height. 
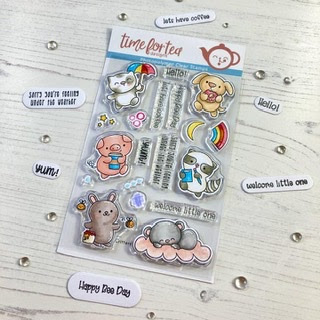
The little critters are from the All Occasion Critters Stamp set that was in the August release too they are so sweet. They didn't really take much colouring as they are only small. I used my go to my beloved Copics and cut them out with the matching dies. I popped them onto the top hexagon and stamped on my sentiment and stuck everything together. 
It's such a great design for when you need a quick card but still want it to really pop! I hope you like it as much as I do. Have a nice weekend and don't forget you can get 10% off in the shop using T4TNATALIE10 


Saturday 19 September 2020

Cute Hello note cards!


Happy Saturday everyone it's Design Team member Natalie here and I have some adorable note cards to share with you today. I made two variations but I feel like you could make a whole series of them. These I made quite a while ago so have quite bright summery colours but some rich autumn colours with the Woodland critters stamp set would be so cute. 
I started out by cutting out six rectangles using the Hello Rectangle Stitched Nesting Dies four I stuck together at the top to make two card bases and the other two will be our toppers. Taking the topper pieces i stamped out the Essential Stripes off centre and more towards the top so it's more aesthetically pleasing. I like the softer colours as it doesn't distract from the soft coloured images. I stamped my stripes with Distress Oxide so made sure they were fully dry before cutting out the Hello die and also made sure I kept all the tiny pieces like the inside of the e and o. 
The cute raccoon and bear are both from the All occasions critters stamp set which I coloured very simply as they only small with Copic Markers. I cut these out with the coordinating dies and also cut out the die shape out of some fun foam I like using this as it gives a cleaner look than foam tape. Using the foam tape again I also cut out another hello die.
To put the card together I stuck on the topper to the base of the card then stuck the foam tape hello in the gap where I die cut it from then stuck on the hello I cut from the striped background on top and added the stripped pieces from the inside of the o and e. The critter was added in the same way but i just chopped off a bit of the fun foam where it meets up to the letters and that was my cards finished.
I hope you like them and as always don't forget you can get 10% off  in the shop using T4TNATALIE10 
Have a great weekend everyone and I will see you all again next week!


Saturday 12 September 2020

Missing you Pig Time!


Happy Saturday everyone it’s Design Team member Natalie and I have another card to share with you all. 
I love finding ways to stretch my dies so I had to turn that fun windmill into a little Piggy house. It was a quick card to make with not too much colouring. The base of my card is cut from two of the larger quilted square nesting dies I just scored one at the top all the way across about 1 cm down and then added some double sided tape and stuck them together . Then I cut out the one smaller to make the card I used the Sunny Side up die to stencil the clouds in a soft grey to look like a stormy sky. Then splattered some dark grey for some added detail and stamped out some birds and the sentiment. The Picket Fence is cut from the Windmill Add on die set and I just added some shading with a cold grey copic marker. The Piggy house I cut out the top bottom and door out of white card stock so that it would be a bit sturdier and my paper was really thin then just cut them out again from some pretty paper and popped it all together. Patterned paper is such a quick easy way to do this and look so pretty. 
The grass is die cut with the new Landscape Edge standalone die set I love this set as most of my cards are scenes it adds fun details and layers. I coloured it in with some green oxide inks and added a splash of dark green for some extra detail then coloured up my piggies. I wanted an extra muddy puddle too so I stamped out the pig with the umbrella again but masked off the pig and wiped away the foot then just filled in the line I could have drawn my own I guess which might have been easier but I must have been feeling lazy. Then I popped all my card together it really didn't take long other than deciding how I wanted things laid out. I hope you like my card and don't forget you can get 10% off in the shop using code T4TNATALIE10  . Hope you all have a good weekend!


Hogs and Kisses Coordinating Dies


Saturday 5 September 2020

Hang in There!


Happy Saturday everyone its Design Team member Natalie here sharing some more inspiration with you. Today I have a cute bunny card for you using the new Up, Up and Away stamp set. 
The slimline dies are perfect for this set creating a long card for your scene giving the impression your bunnies are flying high into the sky.
I used the slimline die to cut out three pieces of white card stock this is creates the base of the card and the top layer which I used to make my design on. I used the Sunny Side Up Stencil to create the cloud background using a mix of Picked Raspberry, Worn Lipstick and Dusty Concord Distress Oxides. I also added some splatters of the same Oxide inks alongside gold paint and white gelli roll dots.
It's a real quick and easy background but looks so stunning.
The bunnies were pretty quick to colour too I used warm greys for two of the bunnies and then a colour  of browns for the other one. I tried to stick to a few colours so it wasn't too distracting and cut them out with the coordinating dies and popped them on the background I created. 
To create our custom card base I scored the top of one of the slimline pieces we cut earlier around one and a half scallops down then added some red tape and attached it to the other one this creates a top folding card. Then all was left to do was stick down the front of the card and it was all finished!
I hope you enjoyed my card for today don't forget you can get 10% off in the shop using the code T4TNATALIE10