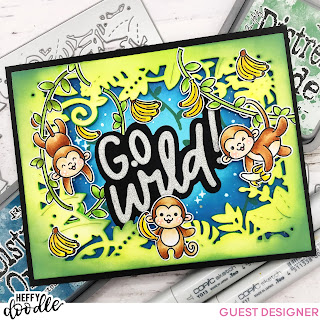
Hi it's Natalie here and I'm so excited to have been asked to be July's Guest Designer for Heffy Doodle. The critters are just the cutest and I had so much fun creating this Jungle at night scene card.
I began my card by cutting out the Go Wild (A2) Frame Dies and ink blending them with a mix of Twisted Citron and Mowed Lawn Distress Oxide inks. I also cut the frame out of green fun foam to add some depth and create the impression of a deep, thick jungle. Next I needed to create the night sky so cut out a piece of white card to fit behind and layered on Chipped Sapphire, Uncharted Mariner and Tumbled Glass Distress oxide. To which I spritzed on water and dabbled it off and splattered on some gold watercolours to resemble stars. Once this was dry I added the vines using Rustic Wilderness Distress Oxide and the vine stamps from the Chimply the Best Stamp Set.
I stamped out all the chimp images, the bananas and vines with memento tuxedo ink on to copic paper and coloured them up with copic markers. For the monkeys I used E37, E35 and E31 for the fur and then E31 and E42 for the faces adding R20 to the cheeks and ears and R32 to the tongue. Finishing them up with some White gelly roll pen dots on the cheeks and black on the dotted eyes. I don't have the Chimply the Best Coordinating Dies so I fussy cut my images but I'd definitely recommend getting the coordinating dies as they are a little fussy to cut and the dies would save so much time.
For the main sentiment I used the big Go Wild die in the Go Wild (A2) Frame Dies using black card for the shadow part and Silver Glitter card for the letters. The black just makes it really pop and I thought the silver works well for the night sky look.
When adhering everything to my card I tried to add some dimension by adding vines behind the lettering and underneath the frame alongside some of the bananas too.
Once everything was adhered I added some dots and stars to the sky using the same white gelly roll pen and that was my card all finished up. I hope you enjoyed my tutorial for today be sure to come back soon for some more inspiration.


No comments:
Post a Comment